
Now Reading: Easy Japanese Chicken Katsu Recipe – Crispy Chicken
-
01
Easy Japanese Chicken Katsu Recipe – Crispy Chicken

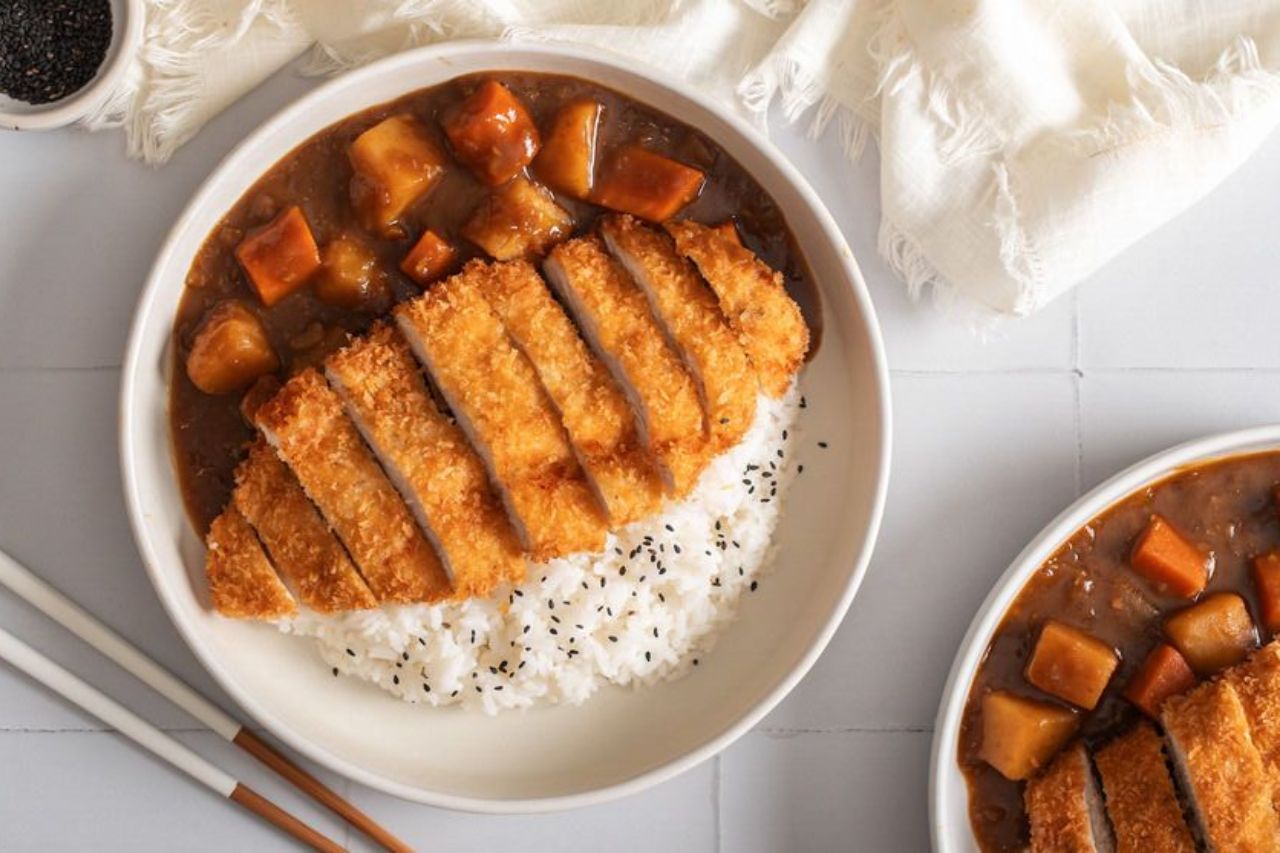
Japanese Chicken Katsu is a crispy, golden chicken cutlet made by coating tender chicken in flour, egg, and Japanese panko breadcrumbs before frying until crunchy. The inside stays juicy while the outside develops a light, crisp coating.
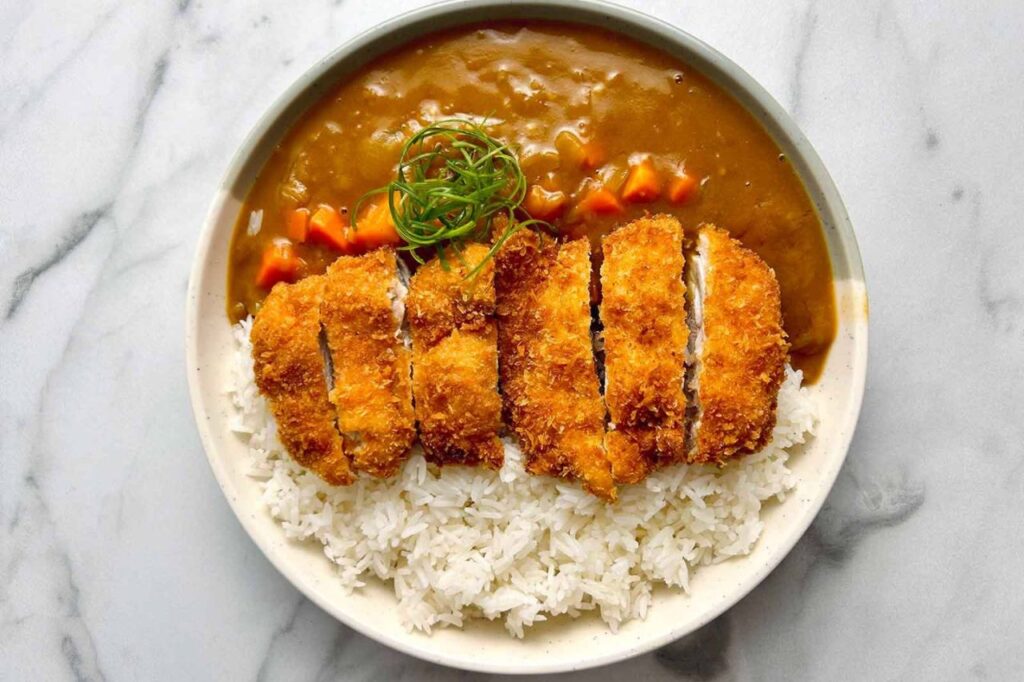
This easy Chicken Katsu recipe is perfect for a quick Japanese-inspired dinner. Serve it sliced over steamed rice with tangy katsu sauce, shredded cabbage, or turn it into a comforting Chicken Katsu Curry.
Japanese Chicken Katsu Recipe at a Glance
- Prep Time: 15 minutes
- Cook Time: 15 minutes
- Total Time: 30 minutes
- Servings: 4
- Cuisine: Japanese
- Main Ingredients: Chicken breast, panko breadcrumbs, flour, and egg
- Best Served With: Rice, shredded cabbage, and katsu sauce
Ingredients
For the Chicken Katsu
- 4 boneless, skinless chicken breasts
- ½ cup all-purpose flour
- 2 large eggs
- 1½ cups panko breadcrumbs
- 1 tsp salt
- ½ tsp black pepper
- Vegetable oil, for frying
For Serving
- Cooked white rice
- Finely shredded cabbage
- Katsu sauce
- Lemon wedges
- Sliced green onions, optional
- Sesame seeds, optional
How to Make Japanese Chicken Katsu
1. Prepare the Chicken
Place each chicken breast on a cutting board.
If the breasts are thick, carefully slice them horizontally to create thinner cutlets. You can also place them between two pieces of plastic wrap and gently pound them to an even thickness.
Aim for chicken pieces that are roughly ½ inch thick.
Season both sides with salt and black pepper.
Making the chicken an even thickness helps it cook at the same rate while keeping the breading from becoming too dark before the center is done.
2. Set Up the Breading Station
Place the flour in one shallow bowl.
Beat the eggs in a second bowl until smooth.
Place the panko breadcrumbs in a third bowl.
Arrange the bowls in this order:
Flour → Egg → Panko
This makes coating each chicken cutlet quick and easy.
3. Coat the Chicken
Take one chicken cutlet and lightly coat it in flour.
Shake off any excess.
Dip it into the beaten egg, making sure the entire surface is covered.
Finally, place it into the panko breadcrumbs.
Press the breadcrumbs gently onto the chicken so they stick well.
Repeat with the remaining chicken.
Don’t press too aggressively, because you want the panko to remain light and airy.
4. Heat the Oil
Pour enough vegetable oil into a large skillet to create a shallow layer approximately ½ inch deep.
Heat the oil over medium-high heat to around 350°F (175°C).
If you don’t have a thermometer, drop a few panko crumbs into the oil. They should immediately sizzle and rise to the surface without burning quickly.
5. Fry the Chicken Katsu
Carefully place the breaded chicken into the hot oil.
Depending on the size of your skillet, cook one or two pieces at a time. Avoid overcrowding the pan.
Fry for approximately 3–4 minutes per side, turning once, until the coating is deep golden brown and crisp.
The chicken should be completely cooked through and reach an internal temperature of 165°F (74°C).
6. Drain the Chicken
Transfer the cooked chicken katsu to a wire rack or a plate lined with paper towels.
A wire rack is especially useful because it allows air to circulate underneath the cutlet, helping the bottom stay crisp.
Let the chicken rest for about 2–3 minutes before slicing.
7. Slice and Serve
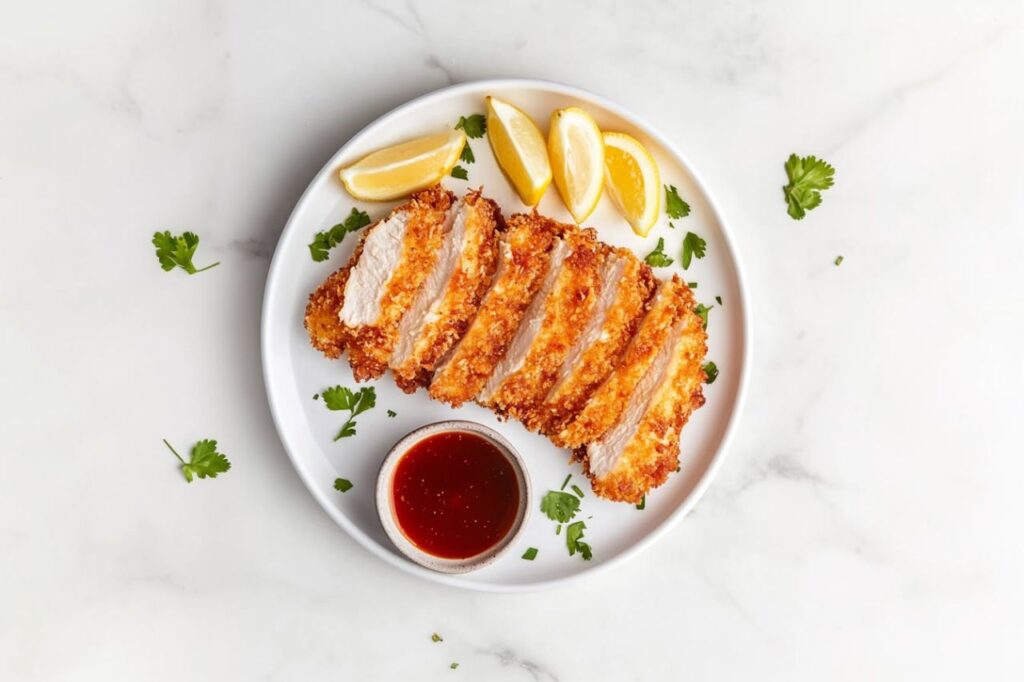
Using a sharp knife, slice each chicken cutlet into strips.
Arrange the sliced Chicken Katsu over steamed white rice.
Add shredded cabbage to the side and drizzle or serve with katsu sauce.
Finish with lemon wedges and sliced green onions if desired.
Serve immediately while the coating is still crisp.
Why You’ll Love This Japanese Chicken Katsu
Chicken Katsu has a simple ingredient list but delivers plenty of texture and flavor.
The panko breadcrumbs create a lighter and crunchier coating than ordinary breadcrumbs, while the thin chicken cooks quickly and stays tender.
It’s also versatile. You can serve it with rice and cabbage, make a Chicken Katsu Curry, place it inside a sandwich, or add it to a simple lunch bowl.
Ingredient Notes
Chicken breast: Boneless, skinless chicken breast works well because it can be sliced into thin, even cutlets. Chicken thighs can also be used if you prefer darker meat.
Panko breadcrumbs: Panko is a Japanese-style breadcrumb with larger, lighter flakes. It is responsible for the characteristic crisp texture of Chicken Katsu.
Flour: Flour creates a dry surface that helps the beaten egg adhere to the chicken.
Eggs: The egg acts as the bridge between the flour and panko coating.
Vegetable oil: Choose a neutral oil suitable for frying, such as canola, sunflower, or vegetable oil.
Katsu sauce: This thick, sweet-savory sauce adds tangy and slightly fruity flavor to the crispy chicken.
What Makes Chicken Katsu So Crispy?
The three-stage coating is the key:
Flour → Egg → Panko
Flour gives the egg something to cling to, while the egg helps the panko adhere evenly.
Panko’s larger flakes create more surface area and a lighter, crunchier coating than fine breadcrumbs.
Keeping the oil at the right temperature is equally important. If it is too cool, the breading absorbs excess oil and becomes greasy. If it is too hot, the outside can brown before the chicken is fully cooked.
How Do You Keep Chicken Katsu Crispy?
After frying, place the chicken on a wire rack instead of stacking the pieces.
Stacking traps steam between the cutlets and can soften the crispy coating.
It’s also best to slice and serve the chicken soon after frying.
If you’re preparing several pieces, keep the cooked katsu on a wire rack in a warm oven rather than covering it tightly.
Can You Make Chicken Katsu in an Air Fryer?
Yes. Lightly spray the breaded chicken with cooking oil and arrange the pieces in a single layer in the air fryer basket.
Air fry at approximately 400°F (200°C) until golden and cooked through, turning halfway through.
The exact cooking time depends on the thickness of the chicken, so check that the center reaches 165°F (74°C).
Japanese Chicken Katsu Variations
Chicken Katsu Curry: Serve sliced Chicken Katsu over steamed rice with Japanese curry sauce.
Chicken Katsu Sandwich: Place sliced katsu between soft white bread with shredded cabbage and katsu sauce.
Chicken Katsu Don: Serve the cutlet over rice with a softly cooked egg and savory onion sauce.
Chicken Thigh Katsu: Replace chicken breast with boneless chicken thighs for a juicier, richer version.
Baked Chicken Katsu: Coat the chicken with panko and bake until golden and fully cooked for an alternative to deep frying.
Spicy Chicken Katsu: Add a little chili powder or serve the finished katsu with spicy mayonnaise.
What to Serve With Chicken Katsu
Chicken Katsu works particularly well with simple Japanese-style sides:
- Steamed white rice
- Shredded cabbage
- Japanese curry
- Miso soup
- Pickled vegetables
- Cucumber salad
- Edamame
- Katsu sauce
- Lemon wedges
For a simple dinner, rice, cabbage, and katsu sauce are all you need.
Can You Make Chicken Katsu Ahead of Time?
You can prepare and bread the chicken several hours ahead.
Arrange the breaded cutlets in a single layer, cover them, and refrigerate until you’re ready to cook.
For the best texture, fry the chicken shortly before serving.
Cooked Chicken Katsu can also be refrigerated, although the coating will not remain as crisp as freshly fried katsu.
How to Store Leftover Chicken Katsu
Allow the cooked chicken to cool before placing it in an airtight container.
Refrigerate for up to 3 days.
To reheat, use an oven or air fryer rather than a microwave. Heat until the chicken is warmed through and the coating has become crisp again.
You can also slice leftover katsu and use it in sandwiches, rice bowls, or salads.
Frequently Asked Questions
What is Chicken Katsu?
Chicken Katsu is a Japanese-style breaded chicken cutlet coated in flour, egg, and panko breadcrumbs, then fried until golden and crispy.
What is the difference between Chicken Katsu and fried chicken?
Chicken Katsu uses a relatively simple breading of flour, egg, and panko. The panko gives it its characteristic light and crunchy texture.
Can I use regular breadcrumbs instead of panko?
Yes, but the texture will be different. Panko produces larger, crunchier flakes and is the preferred choice for traditional-style Chicken Katsu.
Why is my Chicken Katsu not crispy?
The oil may have been too cool, the pan may have been overcrowded, or the cooked chicken may have been covered while hot. Maintain the correct oil temperature and place fried katsu on a wire rack.
Can I use chicken thighs?
Yes. Boneless, skinless chicken thighs make a juicy Chicken Katsu and can be prepared using the same flour, egg, and panko coating.
What sauce is served with Chicken Katsu?
Katsu sauce is the classic choice. It has a thick consistency and a sweet, savory, tangy flavor that pairs well with crispy chicken.
Final Thoughts
This easy Japanese Chicken Katsu recipe gives you crisp, golden chicken with a juicy center using a straightforward three-step coating method.
For the best results, pound the chicken evenly, use panko breadcrumbs, keep the frying oil at the right temperature, and avoid overcrowding the pan. Serve it with steamed rice, shredded cabbage, and plenty of katsu sauce for a simple Japanese-inspired meal.
Related Posts
Stay Informed With the Latest & Most Important News
Previous Post
Next Post


Advertisement